Boost your website’s ad revenue with AdSanity, a user-friendly WordPress plugin that simplifies how to embed AdSanity ads. Designed for easy integration, it helps users place ads, track performance, and grow earnings without complicated steps. This guide provides clear instructions to help you master the process in minutes.
Whether you’re new to ad management or looking to streamline your workflow, this article breaks down the steps to embed AdSanity on your website. Learn how its intuitive features save time and improve ad performance.
Key Takeaways
- AdSanity is a lightweight plugin for WordPress websites.
- Easy integration ensures quick setup and minimal technical effort.
- Customize ad placements to match your website’s design.
- Track real-time performance with built-in reporting tools.
- Follow this guide to avoid common mistakes during installation.
Overview of AdSanity Features
AdSanity simplifies online advertising with a suite of tools designed to boost revenue and streamline workflows. This platform combines AdSanity features like self-hosted ads, third-party network integrations, and real-time analytics into one user-friendly interface. Whether you run a small blog or a high-traffic site, these ad management benefits ensure ads work harder without overwhelming your site visitors.
Key Benefits
- Easy setup and drag-and-drop ad placement
- Support for multiple ad types (Google Ads, HTML5, custom scripts)
- Automated reporting to track clicks, impressions, and earnings
Core Functionalities
Core tools in AdSanity let you control every aspect of ad performance:
| Feature | Description |
|---|---|
| Scheduling | Set ads to run during peak traffic hours |
| Grouping | Organize ads by category or page type |
| Placement Rules | Define where ads show based on device, location, or user behavior |
These key benefits and tools work together to maximize ad performance while keeping your site fast and secure. With AdSanity, managing ads becomes as simple as building your content.
Preparing Your Website for AdSanity
Before installing AdSanity, proper website preparation ensures your site runs smoothly with the plugin. Start by auditing your platform’s compatibility and design layout to avoid technical hiccups or user experience issues.
Technical Requirements
AdSanity demands specific technical requirements for optimal performance. Verify your site meets these minimum standards:
- WordPress 5.6+ (recommended 6.3 or higher)
- MySQL 5.7+ and PHP 7.4+
- Compatible with WordPress.com Business plans and above
Choose a hosting provider that supports the latest PHP/MySQL versions and regularly update your WordPress core to avoid conflicts.
Design Considerations
Smart website design considerations maximize ad performance without disrupting user experience. Follow these guidelines:
- Use standard ad sizes: 728×90 (Leaderboard), 336×280 (Large Rectangle), or 300×250 (Medium Rectangle)
- Limit ad density to under 30% of page content
- Use Google Analytics to identify high-traffic pages for ad placement
AdSanity’s dashboard helps track these metrics, allowing real-time adjustments to balance revenue and visitor satisfaction.
Installing and Configuring AdSanity
Getting started with AdSanity is straightforward. Follow these steps to install AdSanity and set up your ad management system efficiently.
- Download the plugin from the official WordPress repository or your hosting provider’s marketplace.
- Log in to your WordPress dashboard and navigate to Plugins > Add New > Upload Plugin.
- Upload the downloaded file and activate the plugin. A welcome wizard will guide you through initial plugin configuration steps.

After activation, complete the ad plugin setup by entering your license key. Navigate to AdSanity > Settings to configure ad zones, ad group priorities, and caching options. Here’s a quick checklist:
- Verify server requirements match WordPress version compatibility.
- Set default ad sizes (e.g., 300×250, 728×90) to streamline ad creation.
- Enable debugging tools if you encounter issues.
For advanced plugin configuration, explore the “Advanced Options” tab. Save changes after each section to avoid data loss. The plugin’s dashboard provides real-time previews of ad placements, ensuring ads align with your site’s design.
Need help? AdSanity’s support team offers live chat and email assistance. Their knowledge base includes video tutorials for every step of the setup process. Stay tuned for the next section on embedding ads securely!
Mastering how to embed adsanity on my website
Mastering how to embed AdSanity on your website requires avoiding common pitfalls and knowing troubleshooting tips. Follow these steps to ensure ads load smoothly without disrupting user experience.
“Copying and pasting the ad code exactly as provided is critical. Any changes can stop ads from appearing.”
Common Pitfalls
Many issues stem from small oversights during setup. Avoid these mistakes:
- Modifying the ad code: Even minor edits can break functionality. Use the exact code from your AdSanity dashboard.
- Incorrect placement: Ads must be placed within the body tags of your HTML. Skipping this step can hide ads entirely.
- Ignoring async loading: Forgetting to add the `async` attribute in script tags slows page loads and frustrates visitors.
Troubleshooting Tips
Try these steps if ads aren’t working:
- Verify code placement and line breaks. Check if the code is within the body and retains its original formatting.
- Use browser developer tools to spot errors. Look for JavaScript console warnings that block ads from loading.
- Test ad sizes and spacing. Ensure ads aren’t overlapping content and are labeled clearly (e.g., “Sponsored”).
Pro tip: Prioritize asynchronous loading for faster page performance. Maintain spacing around ads to avoid accidental clicks.
Optimizing Ad Performance with AdSanity
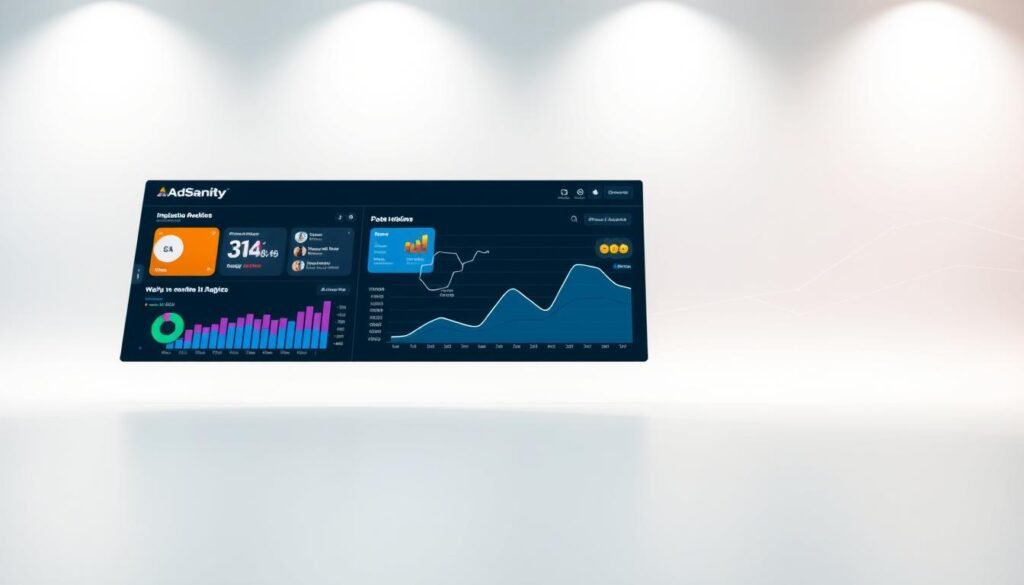
Maximizing revenue starts with tracking the right metrics. AdSanity’s real-time dashboards and MonsterInsights integration let you monitor ads for trends. Regular checks reveal top-performing spots and opportunities to refine strategies for better results.
Monitoring Results
Track key metrics like impressions and click-through rates daily. AdSanity’s reports highlight underperforming ads. Set up alerts for sudden drops in engagement and adjust creatives or placements quickly.
- Use dashboards to compare ad zones and rotation schedules
- Pair with MonsterInsights for traffic source insights
- Adjust bids or placements based on weekly performance reviews
A/B Testing Strategies
Test ad variations to find the best options. Rotate two ad versions in the same location and compare click-through rates. Run tests for at least seven days to ensure reliable data for A/B testing insights.
- Experiment with ad colors, text length, and placement zones
- Track user interactions using heatmaps or scroll depth tools
- Repeat tests seasonally to adapt to audience changes
Integrating AdSanity with Other Tools
Expand your advertising capabilities by linking AdSanity to third-party tools. Ad integration with services like Google Analytics provides real-time insights. Use plugin integrations to connect with WordPress plugins and external ad networks, streamlining workflows.

Pair AdSanity’s Google Analytics Tracking Add-On for seamless data sharing. This third-party tools connection lets you track ad performance in both dashboards. Key steps include:
- Install the add-on via your AdSanity dashboard
- Link to Google Analytics properties (including GA4)
- View real-time views/clicks in Google Analytics
| Tool | Integration Type | Key Features |
|---|---|---|
| Google Analytics | Analytics | Event tracking, 24-48hr data sync |
| Looker Studio | Reporting | Customizable dashboards, ad performance visualizations |
| External Ad Networks | Ad Display | Supports 300x250px+ sizes, code-based setup |
To add external ads: create a new ad in the dashboard, select “External Ad Network,” enter the ad size, and paste the provided code. The Looker Studio dashboard allows filtering by date ranges and top-performing ads. Always verify third-party ad codes match size requirements before publishing.
Customizing Ad Placement and Design
Take control of how ads appear on your site with AdSanity’s customization tools. Tailor ads to match your brand while ensuring they work smoothly across devices. Let’s explore how to blend style and strategy without sacrificing performance.
Responsive Ad Design
AdSanity’s responsive ad design ensures ads adapt seamlessly to mobile, tablet, or desktop screens. Use the built-in layout editor to test how ads look on different devices. Shortcodes and drag-and-drop widgets simplify adjustments without coding. For instance, the “AutoFit” block automatically scales ad sizes, maintaining visual harmony.
User Experience Considerations
Balance custom ad placement with content readability. Overcrowded pages drive visitors away. Prioritize these tips:
- Position ads above the fold but avoid blocking navigation menus
- Use lightbox or slider formats to reduce clutter
- Test ad visibility using AdSanity’s preview mode
| Best Practices | Avoid |
|---|---|
| Color schemes matching site branding | Intrusive pop-ups |
| Whitespace around ads | Overlapping elements |
| Mobile-friendly button placement | Auto-play video ads |
Optimizing user experience means tracking engagement metrics in AdSanity’s dashboard. Adjust placements weekly to align with audience behavior. Small tweaks here can boost click-through rates without alienating visitors.
Ensuring Website Security with AdSanity
Implementing AdSanity’s features demands attention to website security and ad privacy. Protecting user data and maintaining compliance should be priorities when managing ad content. Regular updates and secure practices prevent vulnerabilities.
Privacy and Compliance Tips
- Enable SSL certificates to encrypt data transfers between users and your site.
- Review AdSanity’s ad delivery settings to comply with GDPR and CCPA regulations.
- Regularly audit third-party scripts to avoid unauthorized data access.
Backup Strategies
Protect ad-related data with reliable backup strategies:
- Automate backups of ad configurations and user data.
- Store backups offline or in secure cloud services like AWS or Google Drive.
| Backup Type | Frequency | Use Case |
|---|---|---|
| Full Backup | Weekly | Complete data snapshots for critical systems |
| Incremental | Daily | Efficient updates to save storage space |
| Cloud Backup | Real-time | Instant recovery for ad campaigns |
Leveraging Analytics to Boost Ad Performance
AdSanity’s ad analytics tools offer clear insights into how ads perform. Use performance tracking features like click-through rates and revenue data to spot trends. Regularly reviewing dashboards helps identify top-performing ads and areas needing improvement.
“Data-driven decisions drive growth. Monitor metrics weekly to stay ahead.” – AdTech Insights Report 2023
- Track ad analytics to compare ad placements and formats
- Adjust bids or creatives based on real-time performance tracking data
- Use historical reports to boost ad performance over time
| Metric | Action to Take |
|---|---|
| Low CTR | A/B test ad creatives |
| High bounce rate | Optimize landing pages |
| Peak traffic times | Schedule ads for maximum visibility |
Regularly exporting reports helps identify underperforming ads. Focus on metrics like impressions and conversions to refine strategies. Small changes using AdSanity’s tools can lead to measurable increases in revenue. Stay proactive with ad analytics—every click and view tells a story about what works best for your audience.
Troubleshooting Common AdSanity Issues
Even with careful setup, minor hiccups can occur. This section provides clear steps to troubleshoot AdSanity issues and restore smooth performance. Many fixes require checking basic setup steps first.
“90% of reported errors are resolved through configuration checks or plugin updates,” says AdSanity’s support team.
Start with these error resolution steps:
- Verify ad code placement matches official documentation
- Disable all plugins temporarily to identify conflicts
- Check browser console for JavaScript errors
- Update AdSanity and WordPress core files
If core fixes fail, explore alternative solutions:
- Test AdRotate as a temporary ad manager
- Contact official support with detailed error logs
- Review server logs for PHP/MySQL errors
For persistent issues, consider these advanced steps:
Use browser developer tools to inspect ad container elements. Compare live site code with saved templates. If ads still fail to load after troubleshooting, reach out to your hosting provider to check server-side restrictions.
Remember: Most technical roadblocks are solvable with systematic checks. Combining these methods ensures you find the root cause quickly without disrupting site traffic.
Conclusion
AdSanity simplifies ad management by blending user-friendly tools with powerful features. This summary highlights how its intuitive setup, customizable options, and real-time analytics empower site owners to boost revenue without technical barriers. From creating ads to tracking performance, every step aligns with best practices like maintaining under 30% ad density and using A/B testing for optimal results.
Ad management recap emphasizes balancing ads with user experience. AdSanity’s support for HTML5 and flexible display options ensure ads fit seamlessly into any design. Its add-ons, such as Impressions and Weighted Ads, provide advanced controls to refine campaigns. With 97% user satisfaction, the plugin proves reliable for both beginners and tech-savvy users.
Regular monitoring and adjustments using AdSanity’s tools keep campaigns aligned with goals. Explore the plugin’s documentation and resources to troubleshoot issues quickly. Whether you’re starting fresh or upgrading your strategy, AdSanity’s features and community support make scaling ad revenue achievable. Start embedding ads today to see measurable improvements in performance and engagement.


